
A few weeks ago I showcased polymer clay artist Tammy Baker. I've invited her to do a couple of guest spots with my designs because her art is just fantastic. For the first batch of switches she pressed the stamps into polymer clay to create a really neat 3D effect. HERE is a link to that post.
For this post, I asked her to showcase the stamps in an inky mixed media style that she uses on some of her switches. For these she's stamped the designs onto the surface. Love her use of crackle, colour and details (those postage stamps are so cute!) I'll post the results below as well as her technique but first a bit about Tammy.
A bit about Tammy
"I live in Sunrise, Florida, just west of Ft. Lauderdale and north of Miami. I have always loved to create, be it painting or making jewelry. For many years when my kids were young we traveled the state doing Art Shows on the weekends selling my mixed media jewelry. Then for some reason, life just got in the way of creating. I packed up my supplies and put them in the garage. Many years passed and my daughter grew up and had my granddaughter, Tiffany. When cleaning out the garage and opening up the boxes of beads, gems and filigrees, Tiffany asked me why I didn’t make things anymore. Her curiosity and enthusiasm sparked that creative fire deep inside of me. This was in 2009, since then I have two shops on Etsy and a few items on Society 6."Tammy's mixed media switches

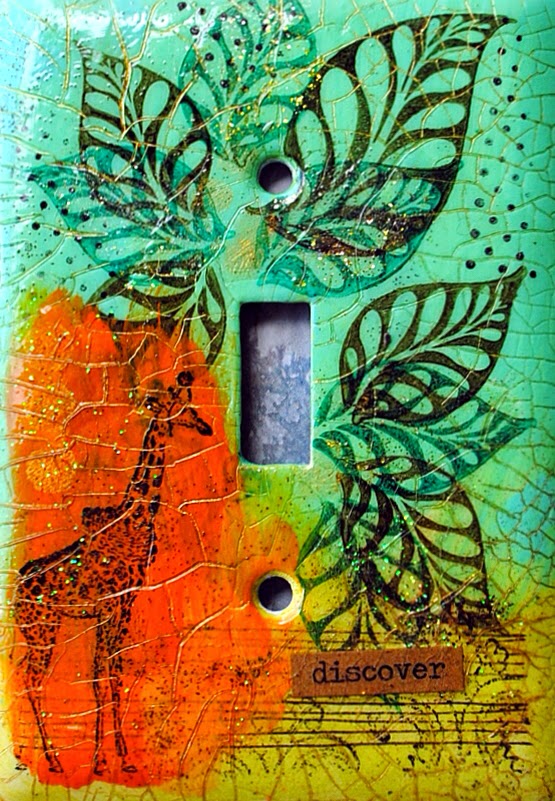
In this piece Tammy has used Fiddlehead Set from my Spirals and Leaves unmounted sheet


In this piece Tammy used Striped Reed Set from my Spirals and Leaves unmounted sheet.


In this piece Tammy used Ornate Leaf Set from my Spirals and Leaves unmounted sheet

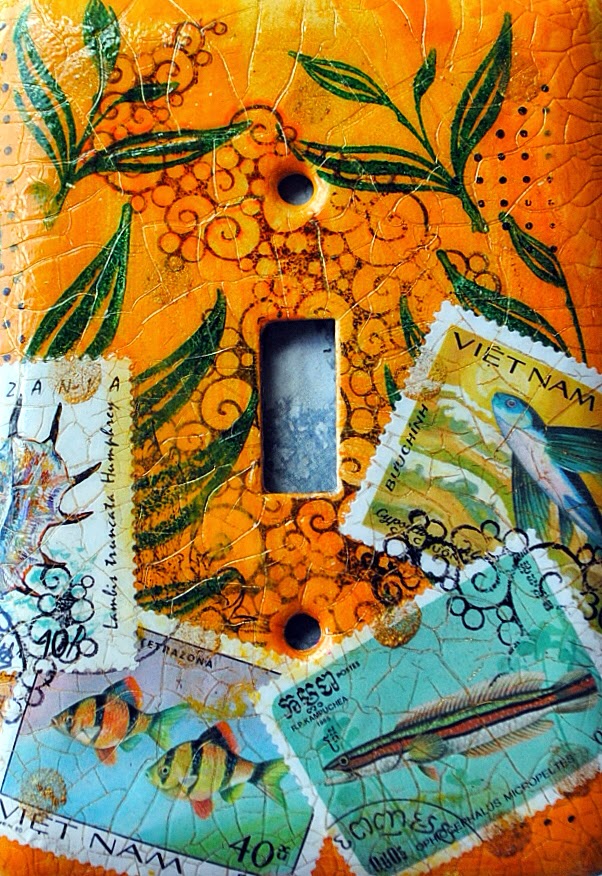
In this piece Tammy used Sea Bubbles Set and Striped Reed Set
How does she do It?
Messy Mixed Media"I define my Messy Mixed Media method as using many different craft mediums in a serendipitous or spontaneous way. This leaves a very chaotic composition that is pulled together my the crackle finish that covers the entire surface.
I start off with a plain metal or plastic switch plate purchased from a home improvement store. I take my acrylic paints and squirt out a small amount of several colors on my tile palate. Then I use my fingers to "finger paint" the background, mixing the colors together. I may even add more paint after the others dry. It’s all about the layering. I may add glitter paint, then Modge Podge. (or decoupage glue.) Stamp some random images, then Modge Podge. Add more glitter paint in a different color. Modge Podge. Add postage stamps, text from books or magazines, Washi tape or even found objects. Then Modge Podge. Yes, there is some down time waiting for the Modge Podge to dry, but it is worth the wait. I will usually add another layer of stamped images before the crackle coat.
With all this Modge Podging I get clear layers in between each medium giving it depth. It’s hard to see in the photos, but when you look at the technique in person you can see how some things come forward as others are pushed back.
At this point the pieces are still very chaotic. This is the time to add the crackle medium. After it is dries and the cracks have appeared I usually add a metallic paint to the top. I wipe off the excess before it dries and the rest goes down in the cracks pulling everything together and adding the final layer. I hope you will experiment with this fun technique!"
A generous coupon for Tammy's Etsy shop
Tammy has also offered ALL of us a coupon code for 15% off in her Etsy shops. All of her pieces are original hand made pieces of art for a really reasonable price. I bought one for myself for my birthday. Couldn't resist. Kirk and I spent a good while looking at it when it arrived. Like a little treasure in the mail :)The code is RYN15. A BIG thank you Tammy for your generosity!!!
Tammy's stores:
https://www.etsy.com/shop/tmbakerdesigns
https://www.etsy.com/shop/studiotambria
Bye for now!
Thanks so much for stopping by and for reading through my post. Hope you found Tammy's art inspiring as I do. I've got another Guest Designer post coming up next week. Ellie Knol made a whole tutorial for us! Exciting :)Bye for now,
Ryn
Very clever makes...nice jewelery on ebay too Tammy!
ReplyDeleteThanks for your comment and for checking me out.
DeleteCool!
ReplyDeleteThese are certainly creative and unusual Tammy, and the colours are so bright and pretty! I think it was certainly the right thing to get your stuff back out of the garage and let your artistic side out to play! x
ReplyDeleteThanks for your comment! It's all about the "playing".
DeleteGorgeous art Tammy!
ReplyDeleteThank you!
DeleteThanks. Try different mediums it's fun.
ReplyDeleteI agree, gorgeous artwork ! Shirleyx
ReplyDeleteOH my Goodness! GORGEOUS light switch covers!
ReplyDelete